Loading
Need some help with installing WebAbility?
Find your answers here
How to Install WebAbility Widget on WordPress
Before You Begin
Installing WebAbility on WordPress is straightforward, whether you're using our dedicated plugin or adding the widget code directly. Let's get your WordPress site accessible in minutes.
What you'll need:
- Admin access to your WordPress dashboard
- Your WebAbility account credentials
- 5-10 minutes (depending on your method)
Compatibility:
WebAbility works seamlessly with:
- WordPress 5.0+ (we recommend 6.0+ for best performance)
- All major page builders (Elementor, Divi, Beaver Builder, WPBakery)
- WooCommerce and other e-commerce plugins
- Multisite installations
- Custom themes and child themes
- Popular caching plugins (we'll show you how to configure them)
Why WordPress Sites Need Accessibility
WordPress powers 43% of the web, but most WordPress sites have significant accessibility gaps. Here's what you need to know:
The WordPress Accessibility Challenge:
- Theme developers often prioritize aesthetics over accessibility
- Plugins can introduce accessibility barriers
- Page builders may generate non-semantic HTML
- Custom CSS can break keyboard navigation
- Media libraries often lack proper alt text management
Legal & Business Impact:
- WordPress sites are frequently targeted in ADA lawsuits
- Government contractors must meet Section 508 requirements
- Educational institutions need WCAG 2.1 AA compliance
- Better accessibility means better SEO (Google rewards accessible sites)
Common WordPress Issues WebAbility Fixes:
- Missing form labels in Contact Form 7, WPForms, Gravity Forms
- Inaccessible WooCommerce checkout processes
- Slider plugins that can't be keyboard controlled
- Pop-up plugins that trap screen readers
- Menu systems without proper ARIA labels
Installation Method 1: WordPress Plugin (Easiest)
Step 1: Sign Up for WebAbility
- Sign up for Webability. If you already have an account, select Log in.
- Add your domain in the Add Domain tab. Start your 30 or 15 day free trial.
Step 2: Install the Plugin
- In your WordPress dashboard, go to Plugins → Add Plugins
- Search for WebAbility Accessibility Widget or install it directly from the WordPress plugin repository
- Select Install Now. Once it's installed, the Install Now button will change to Activate.
- Select Activate
Step 3: Configure the Widget
- Go to Settings → WebAbility to configure the widget
- Enable the widget and customize the position to your preference
- Use the verify button to ensure your domain is properly configured
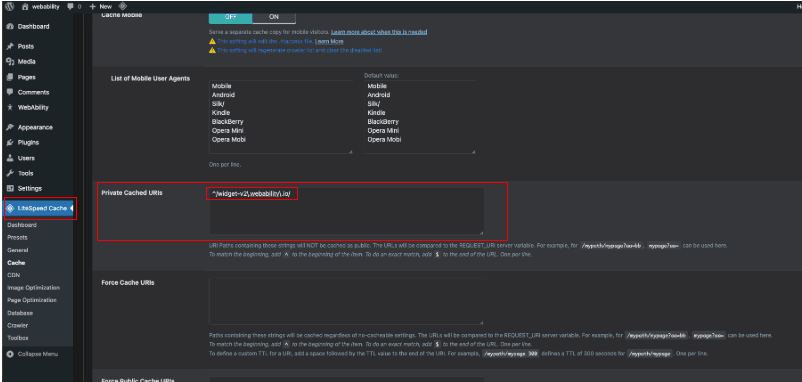
Step 4: LiteSpeed Cache (only if you use it) If your site uses LiteSpeed Cache (common on LiteSpeed hosting), add this pattern on its own line under LiteSpeed Cache → Cache → Private Cached URIs so the widget is not cached as public HTML and keeps working for every visitor:
^/widget-v2\.webability\.io/
Save your LiteSpeed Cache settings at the top or bottom of that screen. See the screenshot below for where to paste it.
That's it! The widget will now appear on your site. Clear your cache if you don't see it immediately.
Alternative Installation Methods
Recommended: Use the WordPress plugin method described above for the easiest installation. The methods below are for advanced users or special use cases.
Getting Your Widget Code
- On the WebAbility homepage, click Login in the top right corner, and log in to your account.
- Go to Sites in the left menu and select your site.
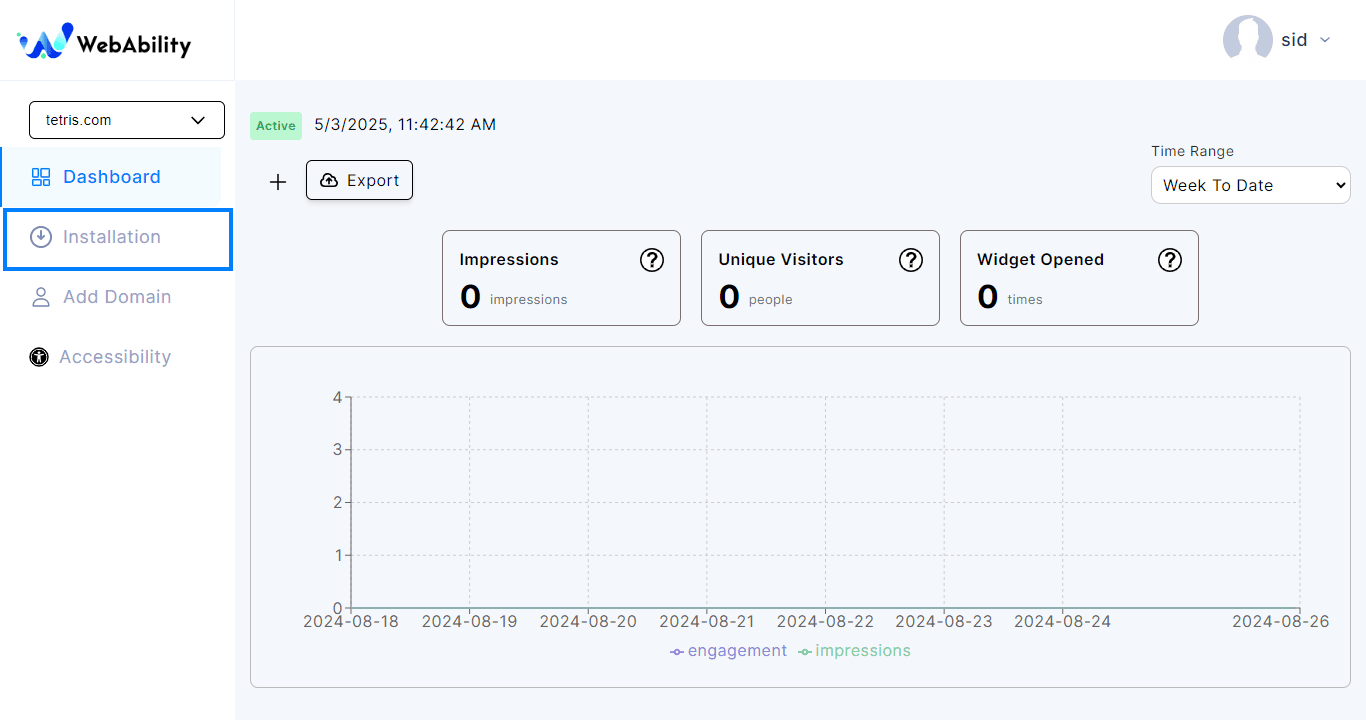
- Install tab - Install WebAbility Widget with our default settings and design to provide the best customer experience.
Quick installation
For best results, paste the installation code right before the ending of the body tag on your website.
<script src="https://widget-v2.webability.io/widget.min.js" data-asw-position="bottom-left-x-20-y-20" data-asw-lang="auto" data-asw-icon-type="m-full" defer></script>- Click Copy to Clipboard to copy the installation script.
- Now that you have your installation script you can add it to WordPress.
Advanced: Using JavaScript Plugins
For those who prefer using a JavaScript management plugin:
Recommended Plugins:
- WPCode – previously known as Insert Headers and Footers
- Simple Custom CSS and JS
- Header Footer Code Management
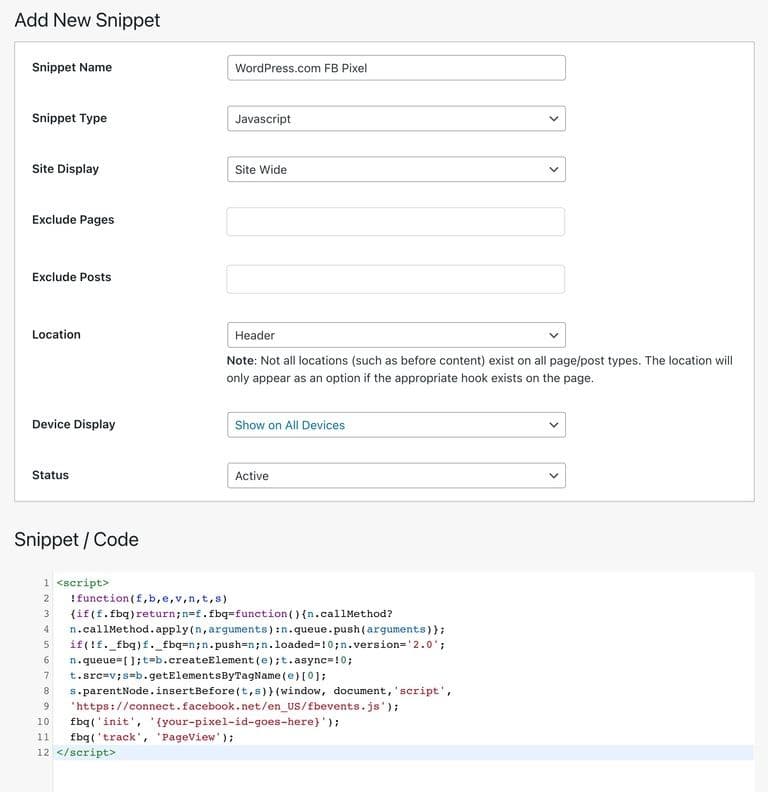
These plugins provide an easy interface to manage JavaScript snippets and allow conditional loading rules.
Installation Method 2: Manual Code Installation
For Advanced Users: If you prefer manual installation or the plugin doesn't suit your needs:
Option A: Via Theme Functions Add to your theme's functions.php or custom plugin:
function add_webability_widget() {
    if (!is_admin()) {
        echo '<script src="https://widget-v2.webability.io/widget.min.js" async></script>';
    }
}
add_action('wp_footer', 'add_webability_widget');
Option B: Via Header/Footer Plugin
- Install a plugin like "Insert Headers and Footers"
- Add the WebAbility script to the footer section
- Save and test
Option C: Direct Theme Edit
- Go to Appearance → Theme Editor
- Select footer.php
- Add the script before the closing </body> tag
- Update file
Post-Installation Setup
Cache Configuration: If using caching plugins, add these exclusions:
- WP Rocket: Exclude /widget.webability.io/ from minification
- W3 Total Cache: Add widget.min.js to "Never minify" list
- LiteSpeed Cache: Exclude from CSS/JS optimization
- Autoptimize: Add widget.webability.io to exclusion list
Performance Optimization:
- The widget loads asynchronously (won't slow your site)
- Only 12KB gzipped
- CDN-delivered for fastest loading
- Lazy-loads additional features as needed
Testing Your Installation:
- Open your site in an incognito window
- Look for the accessibility icon (usually bottom-right)
- Click it to open the accessibility panel
- Test a few features (high contrast, font size, etc.)
- Check your site's score in the WebAbility dashboard
Troubleshooting Common Issues
Widget Not Appearing:
- Clear all caches (browser, CDN, WordPress, server)
- Check if you're logged in (some configs hide it from admins)
- Verify no JavaScript errors in console (F12 → Console)
- Disable optimization plugins temporarily to test
- Check if another accessibility plugin is conflicting
Plugin Conflicts:
- Security plugins (Wordfence, Sucuri) may block external scripts
- Add widget.webability.io to whitelist
- Some page builders need manual insertion in their settings
- Disable "Delay JavaScript Execution" in performance plugins
Multisite Issues:
- Network activate for all sites
- Or activate per-site for granular control
- Each site can have different widget settings
- Super admin can manage all installations
WooCommerce Specific:
- Widget may not appear on checkout without configuration
- Add to WooCommerce → Settings → Advanced → Page setup
- Ensure it's not excluded in your WebAbility settings
- Test with a test transaction to verify
Frequently Asked Questions
Common questions about WordPress installation
No! The widget loads asynchronously and is only 12KB. It won't affect your PageSpeed or Core Web Vitals scores. In fact, better accessibility often improves SEO, which can improve your overall performance metrics.
Yes, WebAbility works with all major page builders. For Elementor, you might need to add it via Elementor → Custom Code. For Divi, use Divi → Theme Options → Integration. Beaver Builder users can add it via Settings → Advanced → Code.
This usually means there's whitespace before <?php in your functions.php. Open the file, remove any spaces or blank lines before the opening PHP tag, and save. If using our plugin, deactivate and reactivate it.
Yes! In your WebAbility dashboard, you can customize colors, position, icon style, and more. Changes reflect instantly without touching WordPress.
Add these cache exclusions: widget.webability.io/*.js and clear all caches. For Cloudflare users, create a Page Rule to bypass cache for the widget URL.
In the WordPress plugin settings, use the 'Exclude Pages' option. Or add this to those pages: <style>#webability-widget { display: none !important; }</style>
Need Help with WordPress Installation?
Our support team has extensive experience with WordPress sites of all sizes, from simple blogs to complex WooCommerce stores.
Note: Whichever installation method you use, make sure to read ourWebsite Onboarding Guideand follow the instructions carefully to get WebAbility Widget set up right and running smoothly.